Appreciate “imperfection” – When they are this young, it is perfection.
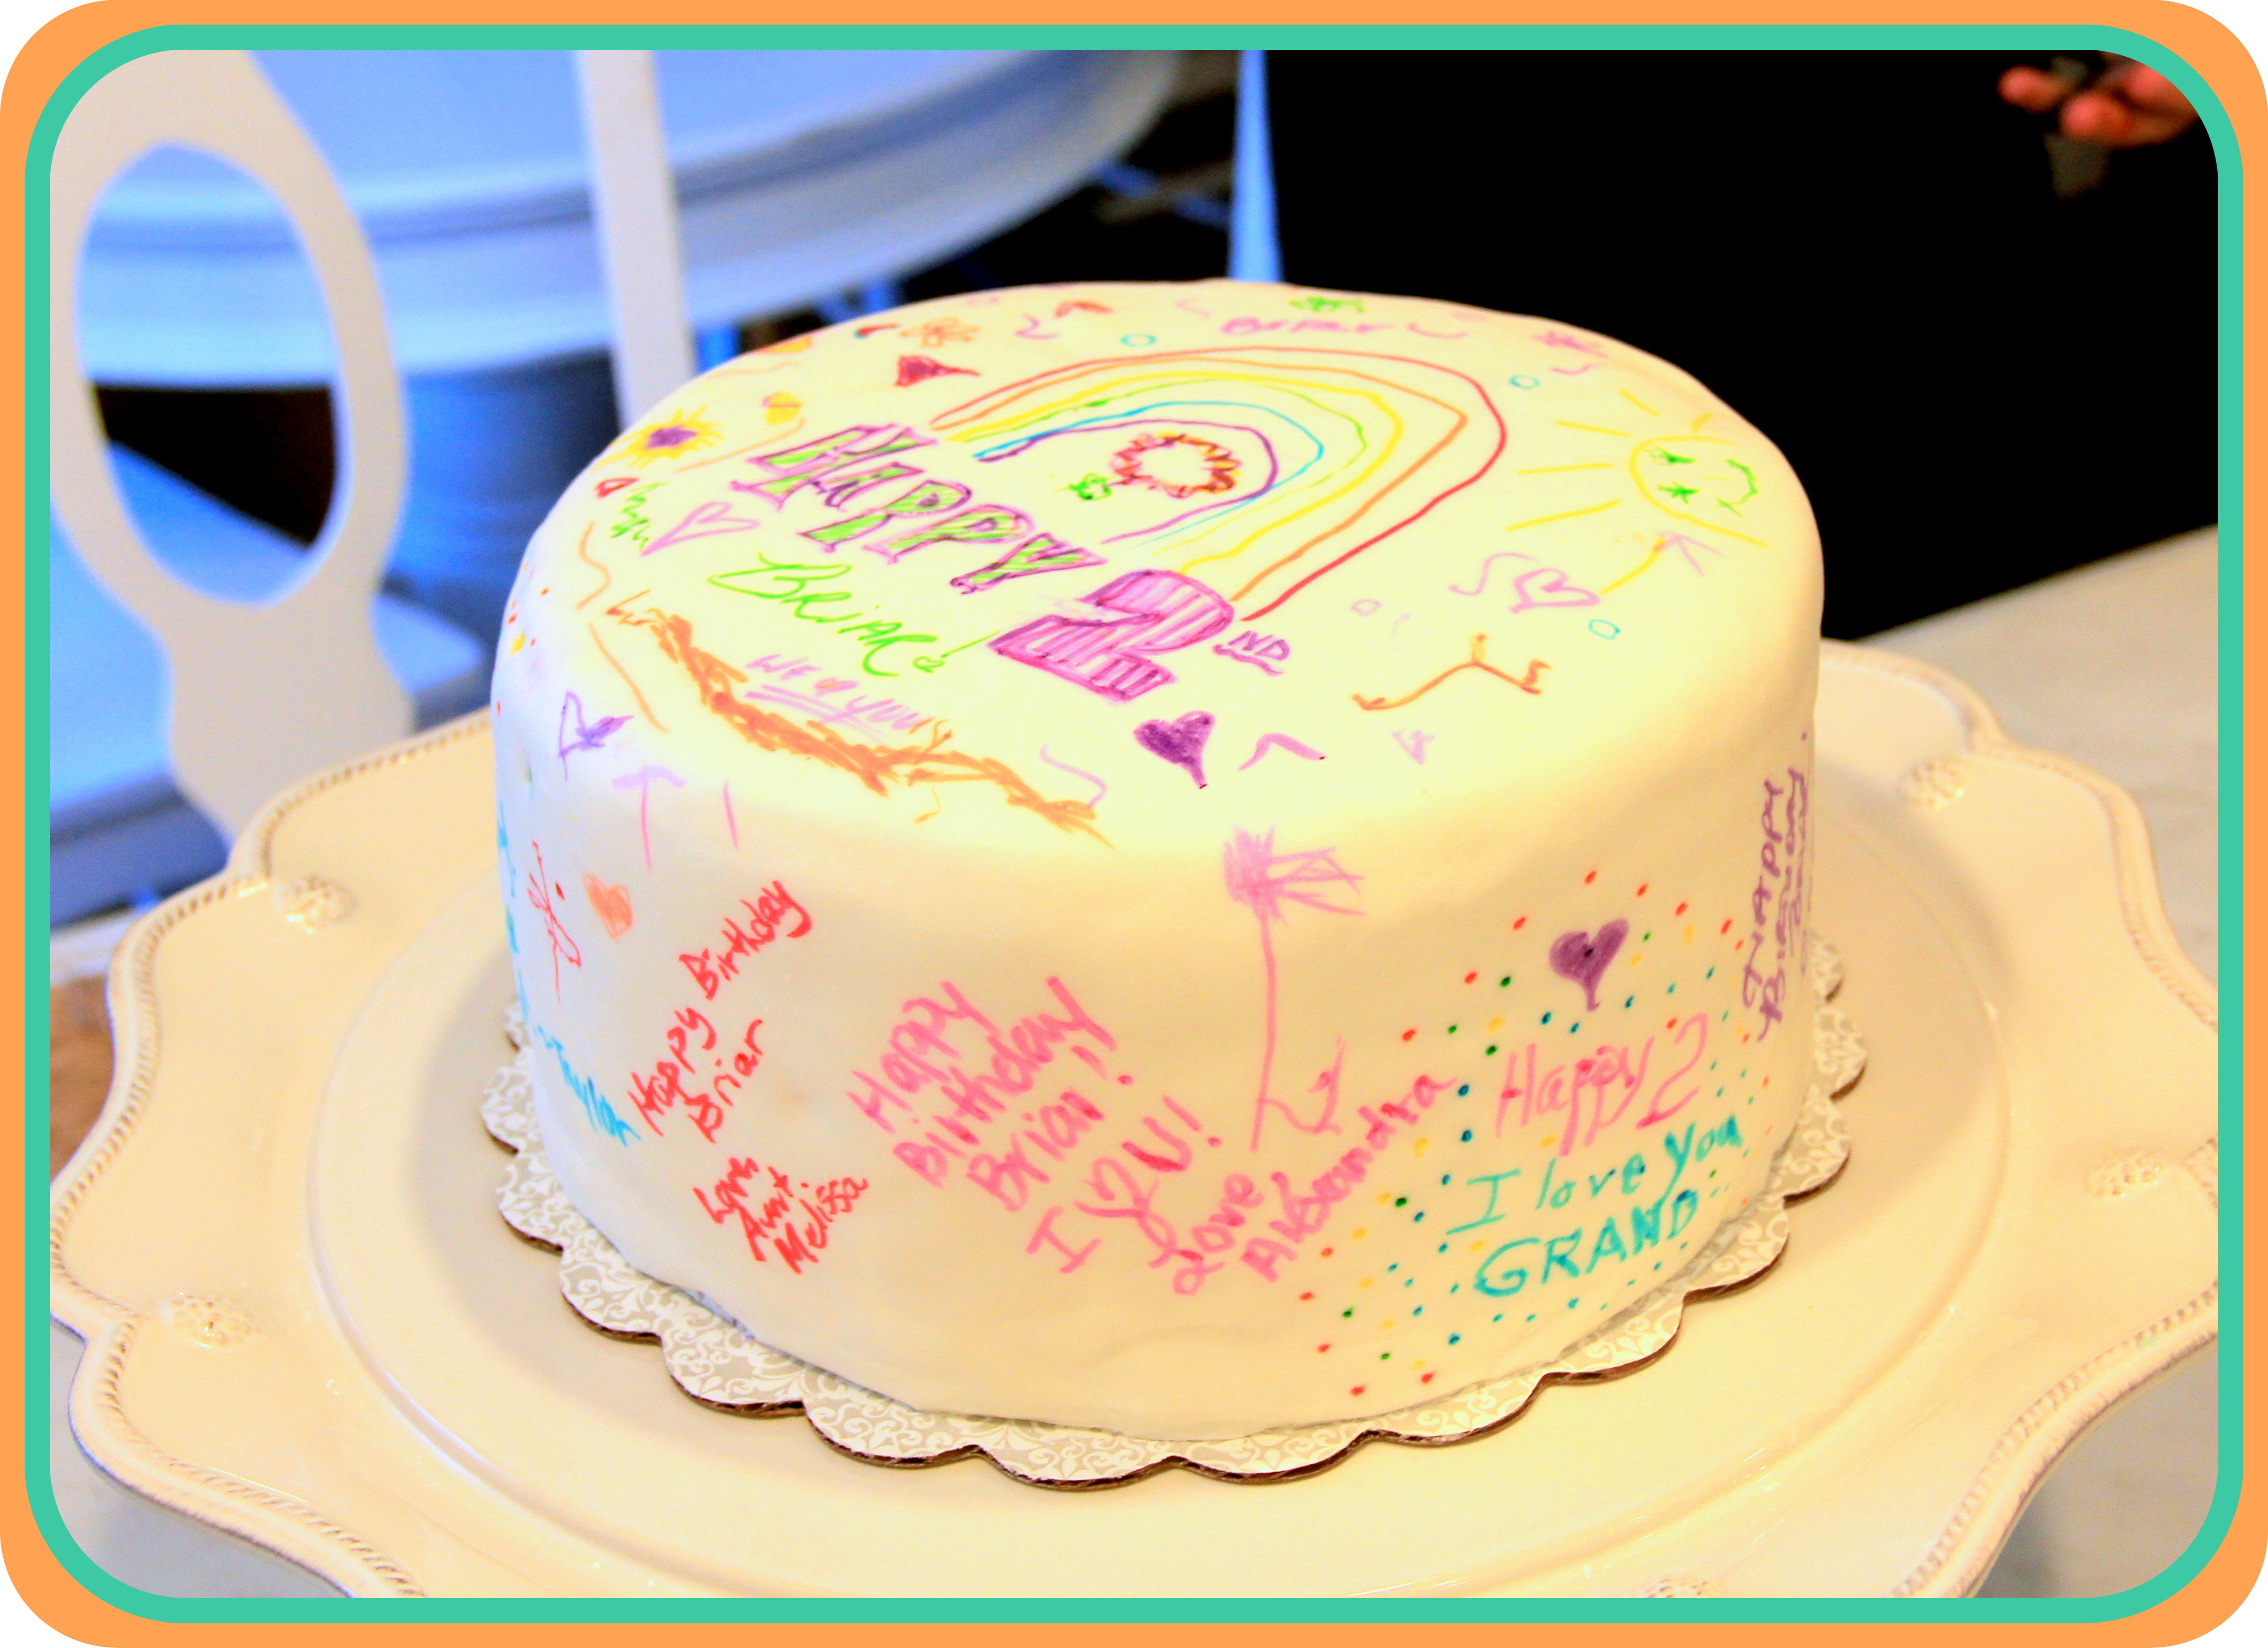
I am go-with-the-flow when it comes to everything that make up my days and nights. Except when it comes to baking projects. And in typical “me” fashion, it was down to two ideas…that i obsessed over… for my little one’s big birthday. Should I attempt a doodle cake… or should I try… blah blah blah. (doesn’t much matter what the other choice was… it’s obvious which I chose, right?)
Anyway, the point of this story is to tell you that although I thought the doodle cake was a little less formal (BECAUSE FORMAL IS WHAT EVERY TODDLER LONGS FOR. I know, giving myself a big “derrrr” right now), one of my favorite people on earth simply replied “You aren’t always going to have these times. Enjoy these times when imperfection is absolutely adorable and perfect.” And so, eventhough I don’t think perfection is necessary at any age (most of the time it should be embraced), it is when they are young, that imperfection is total perfection. too many “ections?”
Ingredients:
2 boxes white cake mix
food coloring (can use generic liquid, but gel will really give you the vibrant colors)
1 batch marshmallow fondant
2 batches of butter cream icing
1 package food grade markers (I used: Gourmet Food Writer Edible Color Markers (10 color set) by AmeriColor / ordered from: Amazon)
Directions:
- Preheat oven to 350 (or whatever temperature your specific cake mix brand requires).
- Prepare the cake batter per the box directions.
- Divide the batter into a separate bowl or tupperware container for each color you would like to use (6 for rainbow).
- In each container, add food coloring until you reach the color concentration you prefer.
- Bake each cake color in a separate 9″ (or 8″ or whatever size/shape cake you would like) baking pan. (*I have three 9″ round pans, so I baked six colors in two sessions). *Be sure to spray each pan with non-stick baking spray.
- Bake until cake begins to pull from the sides of the pan. Cool on wire racks.
- Do not worry if your layers are thin. You are stacking a bunch on top of each other, in addition to tossing on icing in between each.
Construction:
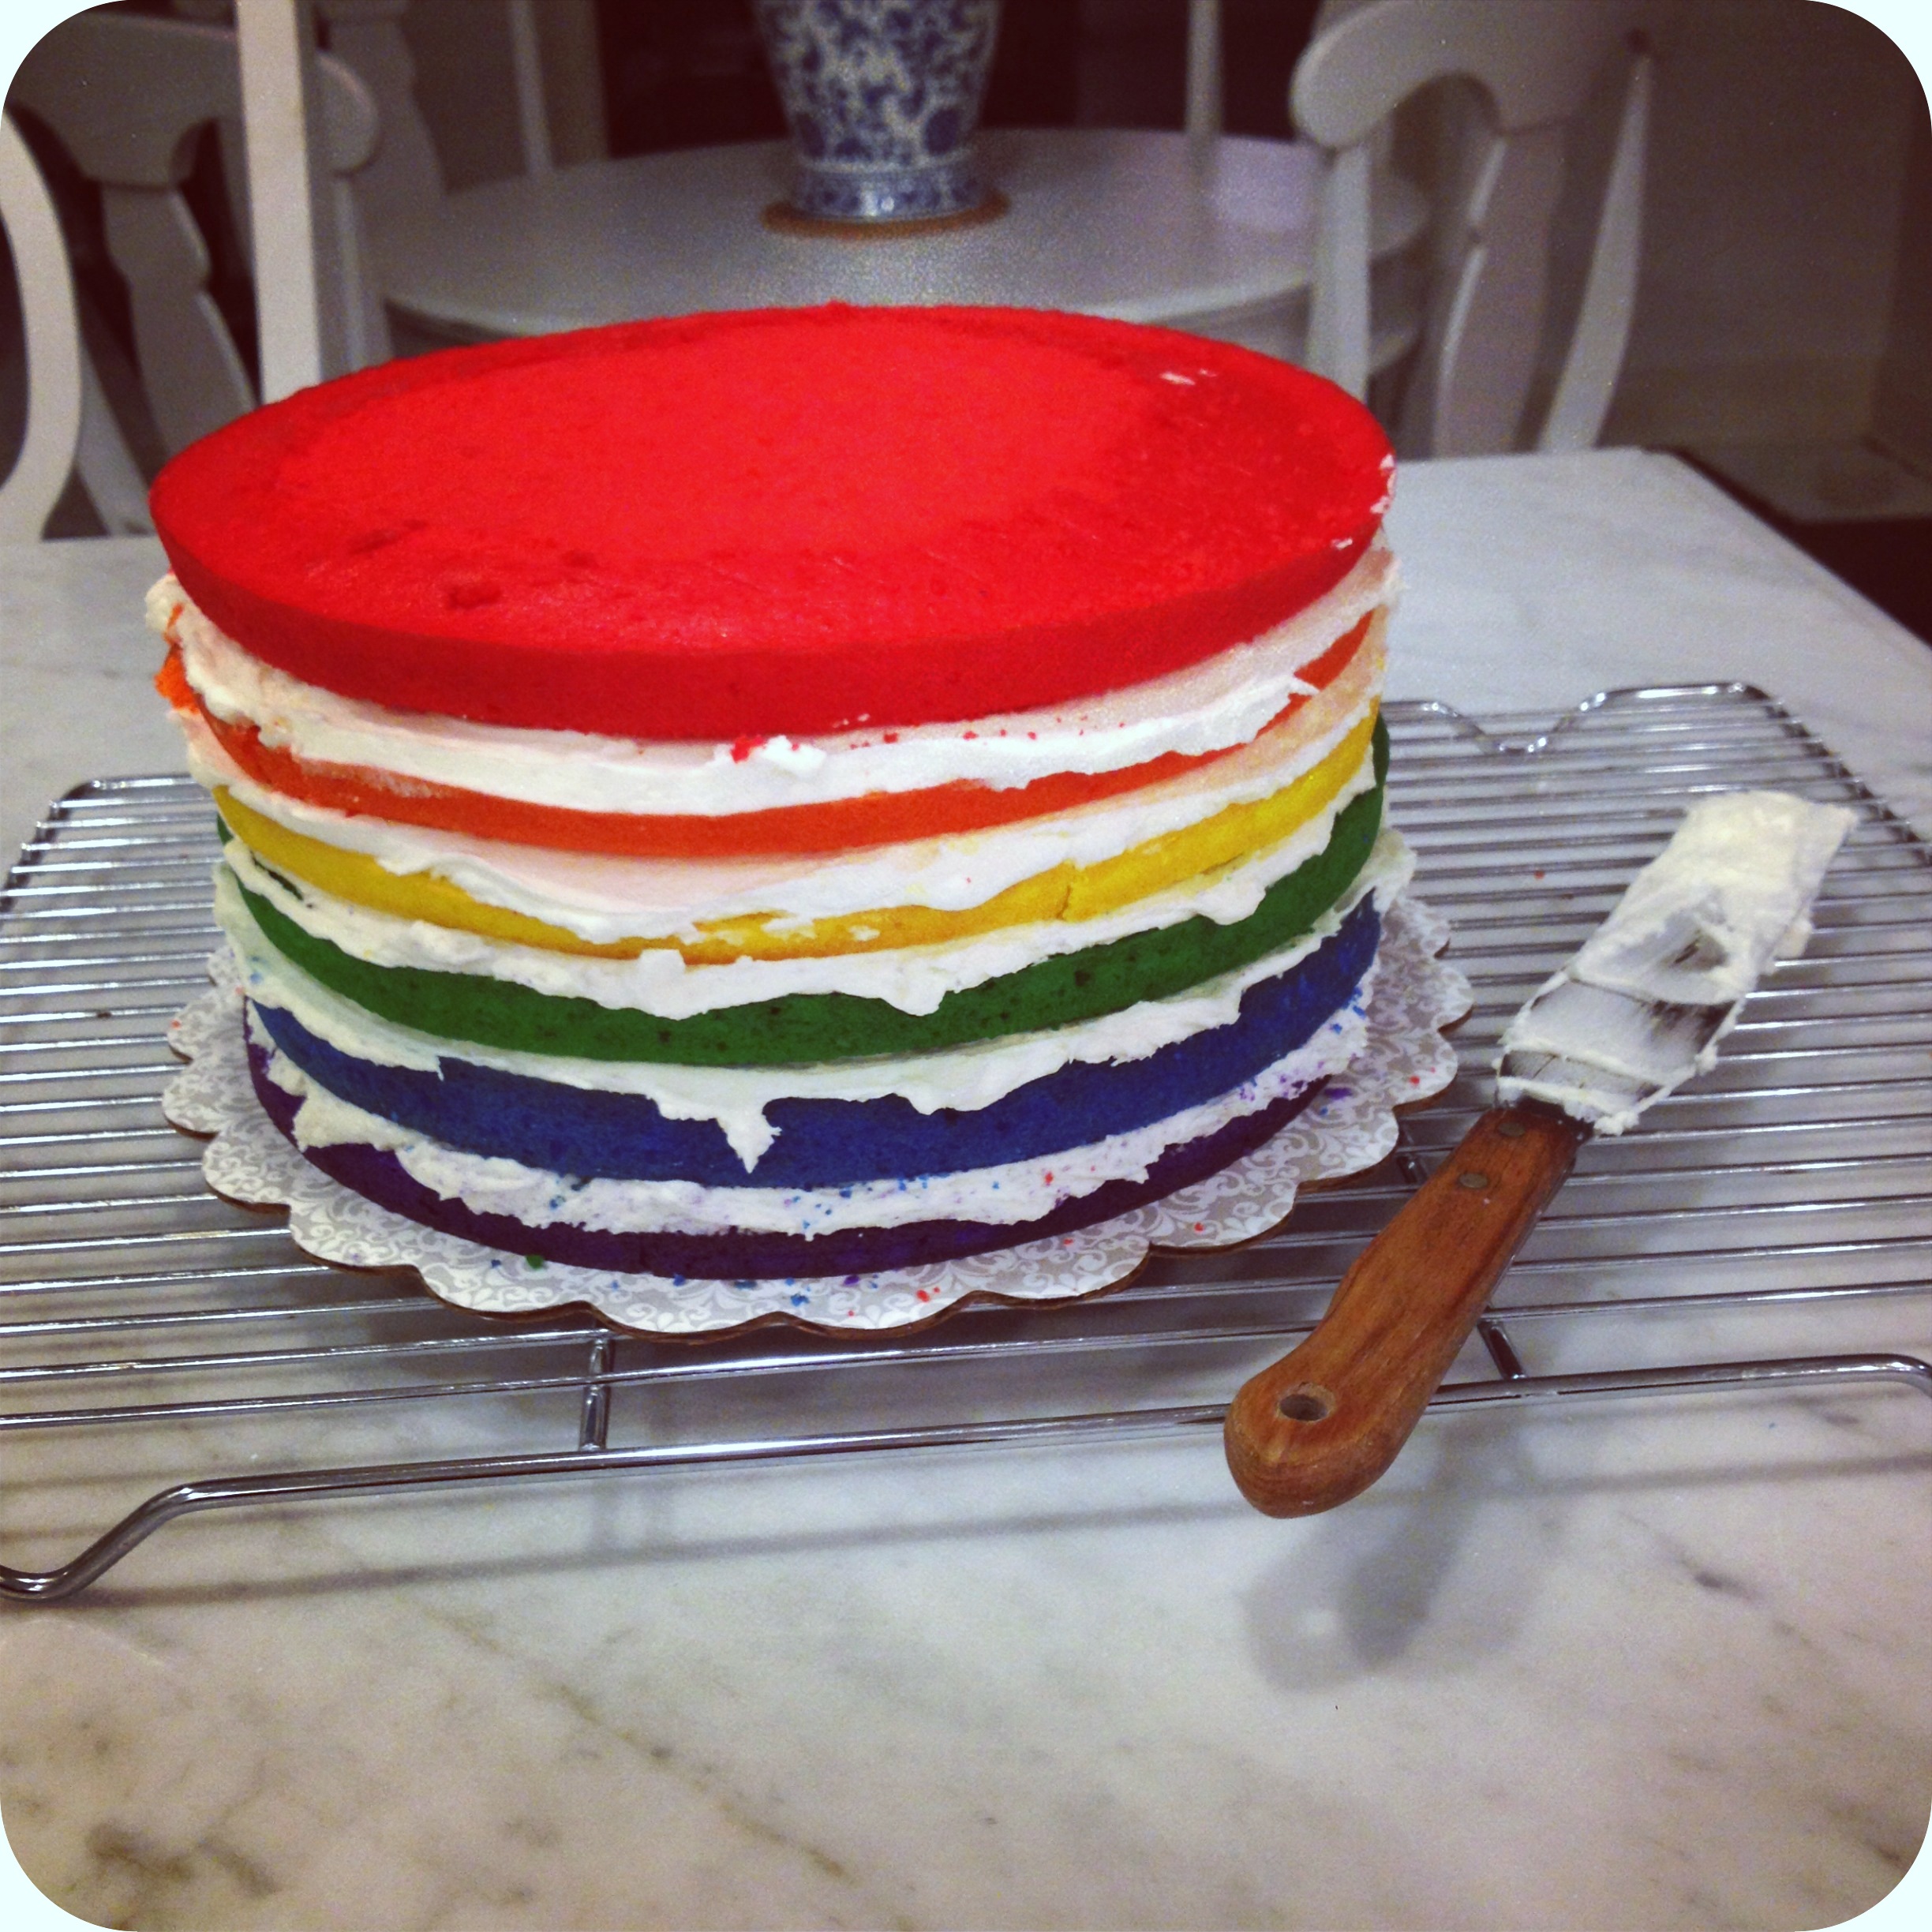
- Once all layers are completely cooled, it’s time to build.
- Prepare 1 batch of butter cream frosting (see above ingredients for link to recipe)
- To avoid the leaning tower of cake (let’s not go too far with the “embrace imperfection concept” here), take a large serrated knife and gently level off the top of each cake.
- Place a dab of frosting on the base you are using and add the first layer. For my rainbow cake, it was purple (or INDIGO as my oldest would shout out).
- Use an offset spatula (or any type of spreading utensil) to add a layer of frosting to the top of your base cake. They say about 1/4″ thick, but it’s usually midnight at this point for me, and I am not about to break out the measuring tape. A little extra frosting never hurt anyone.
- Once you have applied an “as even as you can get it at about 1/4″ inch thick” layer of frosting, place your next layer of cake on top.
- Repeat until you have stacked all layers.
- Take a step back and give a huge Lamaze-breath-type exhale, because you will probably feel as if you just built the empire state building out of playing cards.
- Now, for the crumb coating. Take the second batch of icing and lightly coat the entire cake. This will encase all cake crumbs AND give the fondant an even surface to rest on.
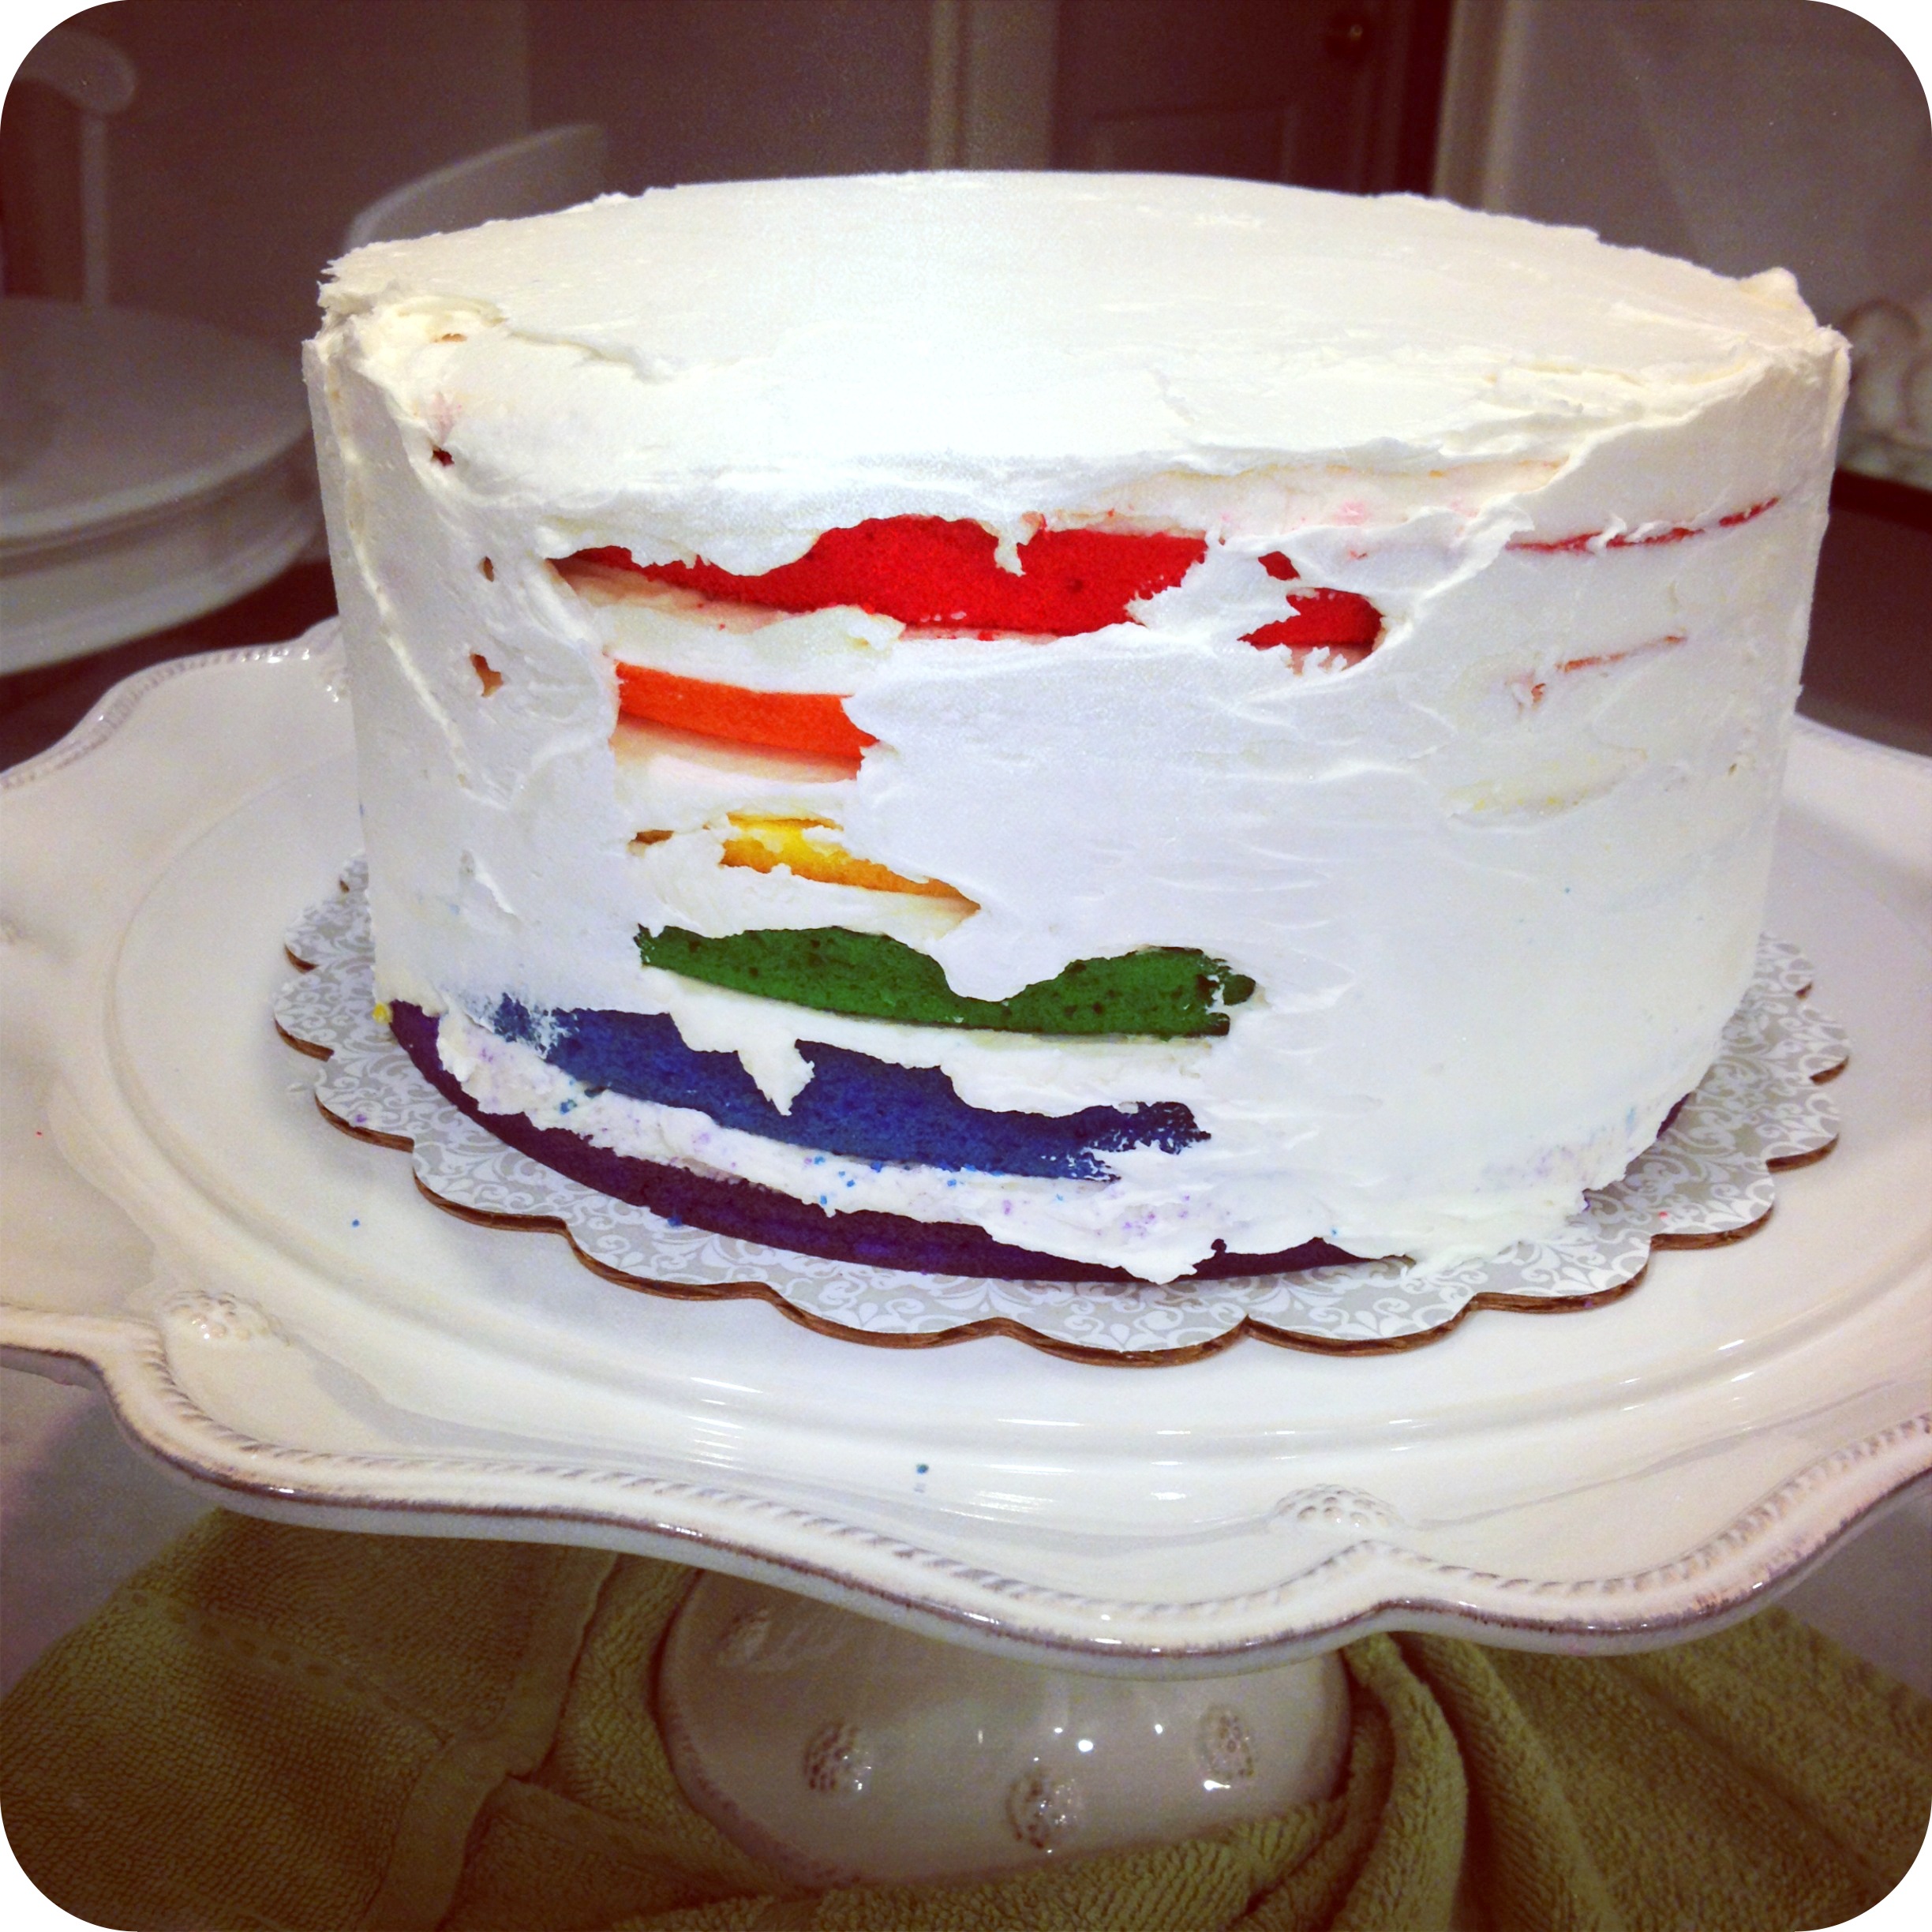
- At this point, it’s best to put your coated cake in the refrigerator to firm up. This will give you a nice solid surface to place your fondant on. I’ve also found that the cake settles a bit overnight. That being said, let your cake settle into it’s new digs for the night. Otherwise, you will cover with fondant, it will settle and you will have saggy fondant when you wake up. AND WHO WANTS SAGGY FONDANT DOODLE CAKE?
- When ready, cover your cake with the fondant. Here is a quick “how to” video: How to Cover a Cake in Fondant
Writing on Cake:
- Here is where things got confusing for me. The author of the original post I read said to store the cake in the refrigerator until it was hard enough to write on. Place back in the refrigerator every 15 minutes or so if the cake started to soften. PROBLEM: Storing fondant in the refrigerator is no bueno. It sweats when you take it out. Aside from humans, do you know what else doesn’t like sweaty cake??? Edible markers. Got my oldest ready to color her sis’ birthday cake and 2 minutes after she began, the markers went kaput. The fondant was wet and apparently, food grade markers prefer desert-like conditions.
- SO, I left the cake out overnight. Lots of controversy surrounding whether or not you can do this with butter cream filling, but it was delicious and we’re all still here to this day to talk about it… so, that is what I did.
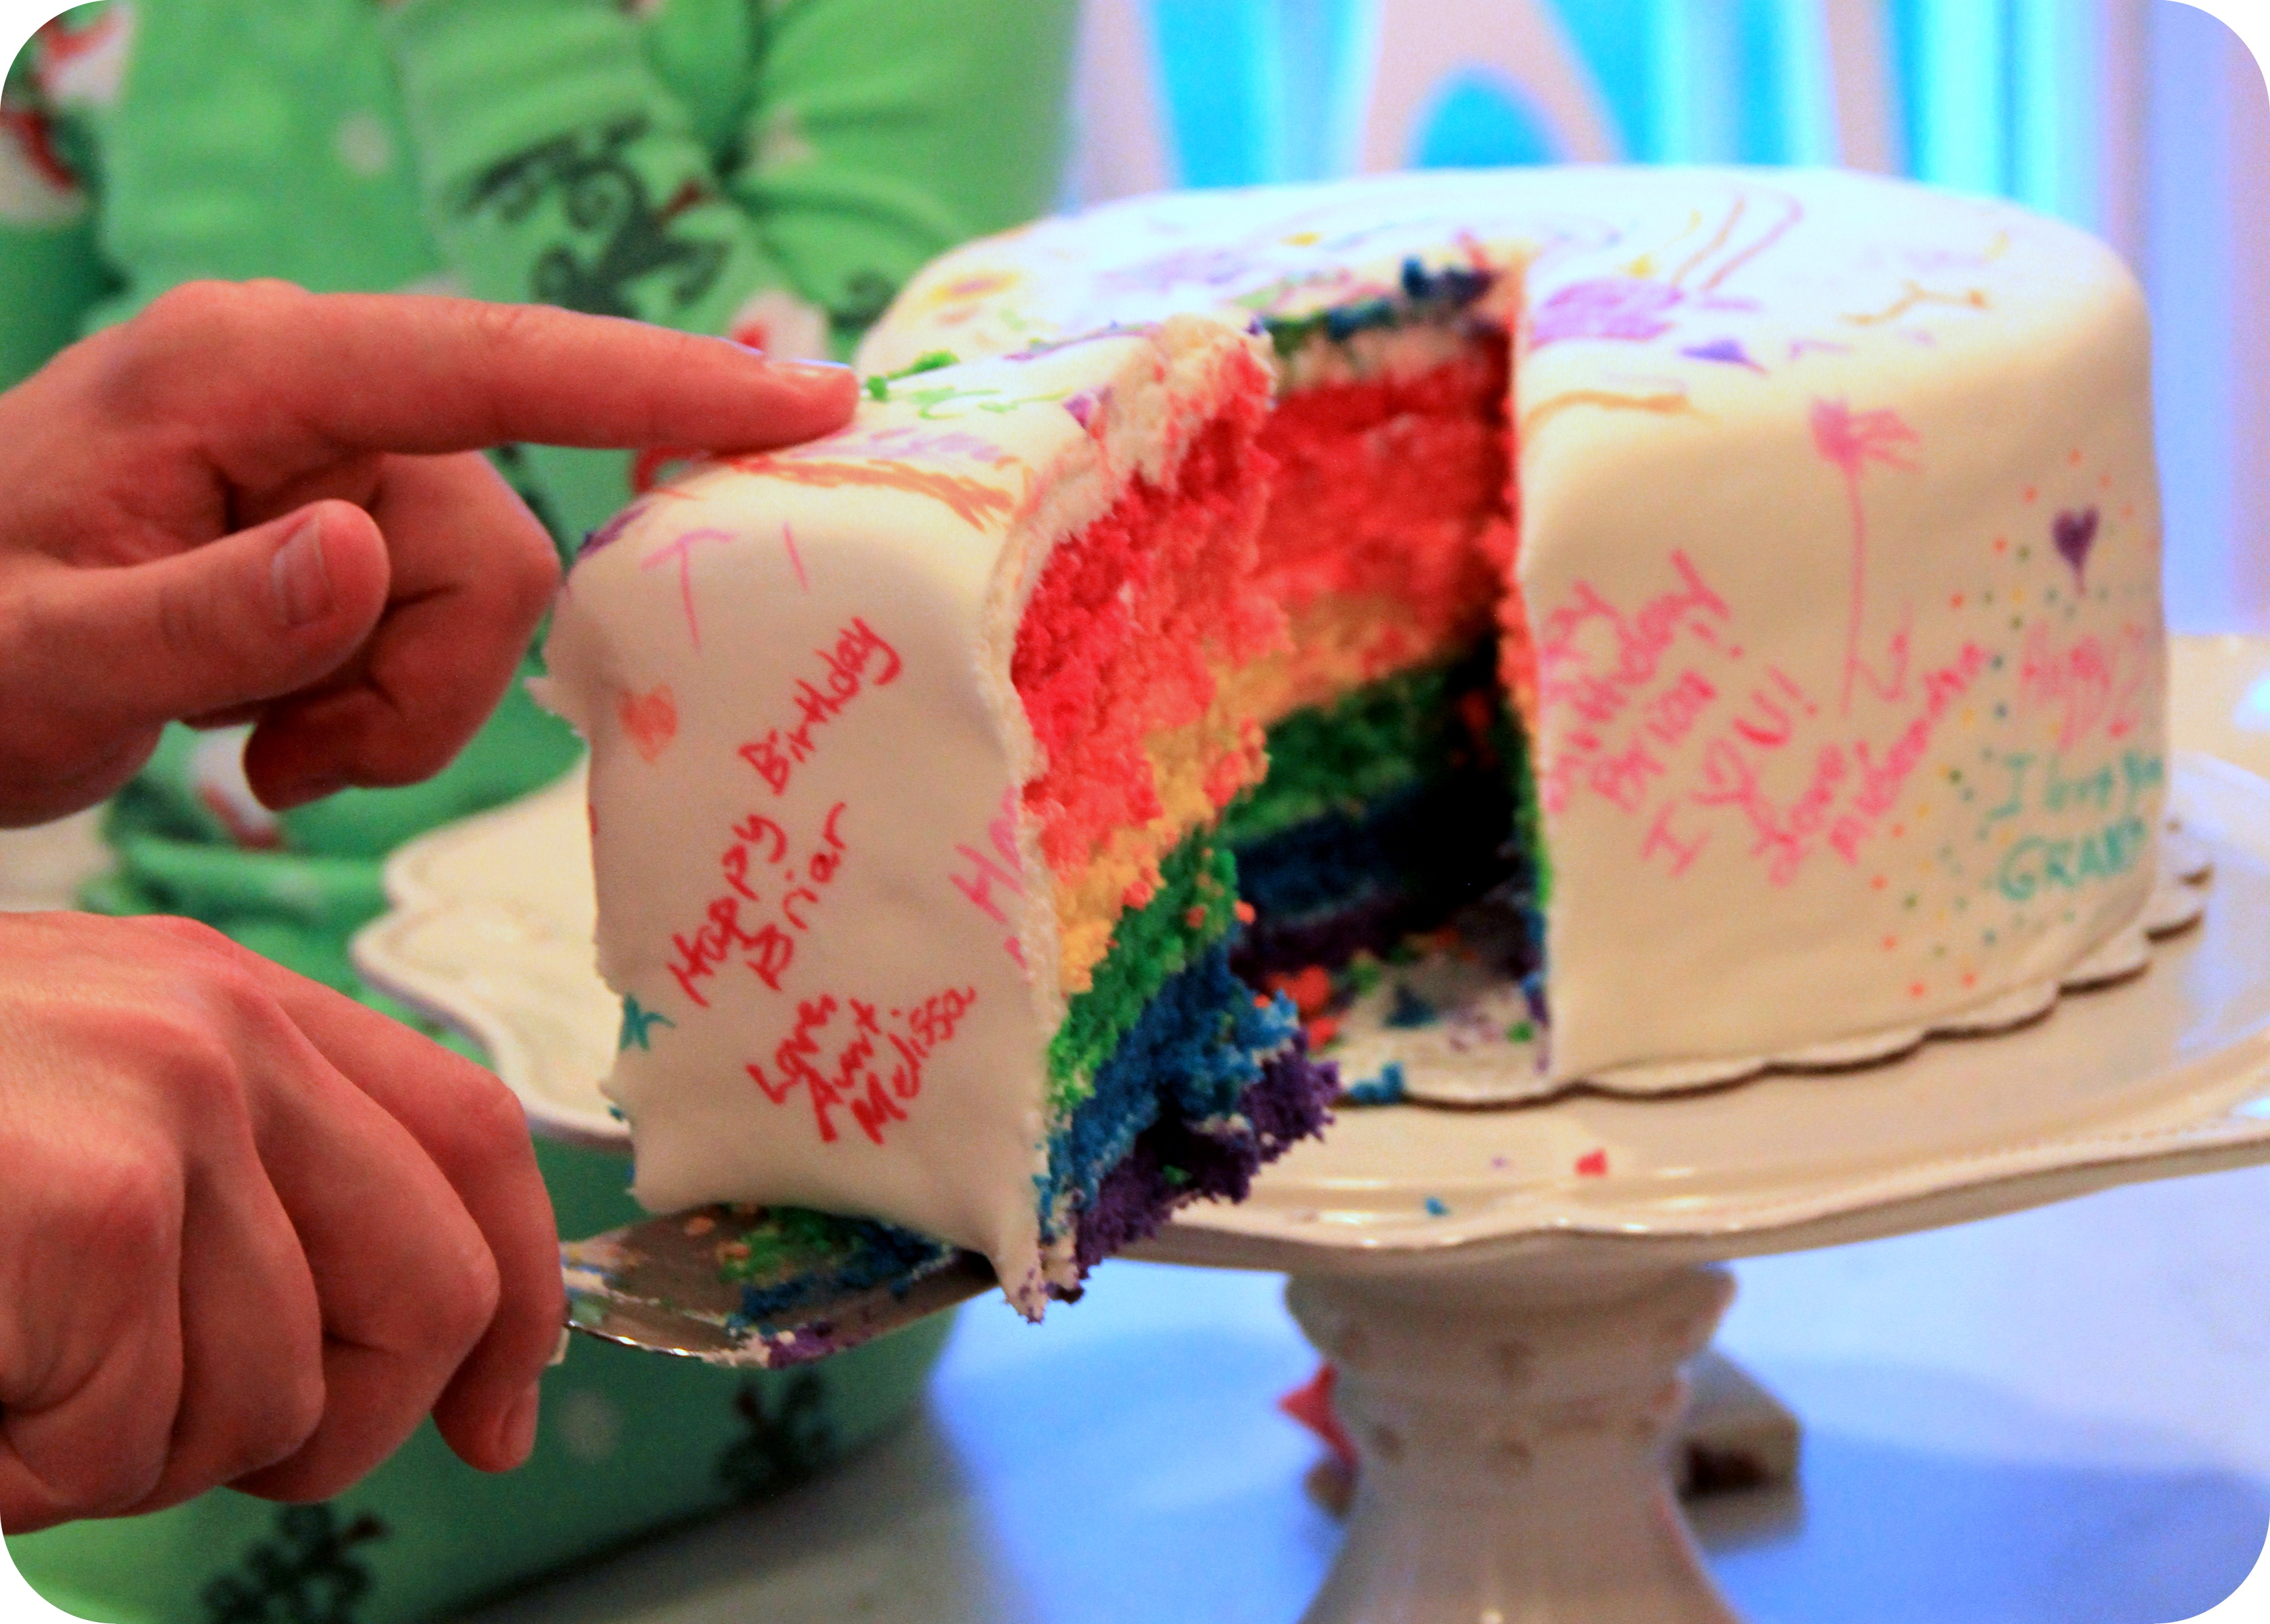
- Also, the original post said to leave the cake out for 5 hours or so to bring it to room temperature before serving. My plan was to have all of the guests sign the cake upon arrival. And considering they were not going to show up 5 hours prior to cake-time, they would be signing a soft cake whether or not I refrigerated.
- Once the cake fondant dried overnight, I handed everyone markers and away they went. Just took a little extra caution not to press too hard.
And there you have it. One doodle cake for one happy little toddler. The personal messages were so lovely and it was so nice to know that everyone contributed to her special celebration 🙂